Connecting to Beam
As an EVM-compatible chain, you can connect to Beam Network using any Ethereum wallet.
To access Beam, you need to add the network’s network configuration in your desired third-party wallet such as MetaMask. Below we’ve added the instructions on accessing Beam through MetaMask.
Connect to Beam Mainnet with MetaMask
| Beam Mainnet | Settings |
|---|---|
| Network name | Beam Mainnet |
| RPC URL (http) | https://build.onbeam.com/rpc |
| RPC URL (WebSocket) | wss://build.onbeam.com/ws |
| Chain ID | 4337 (0x10f1) |
| Currency symbol | BEAM |
| Block explorer URL | https://subnets.avax.network/beam |
| One-click setup |
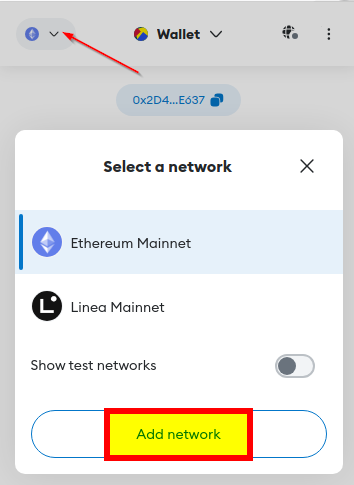
Open MetaMask & Add Network
Launch MetaMask and select the top left option labeled “Ethereum Mainnet”. Next, choose “Add Network”.

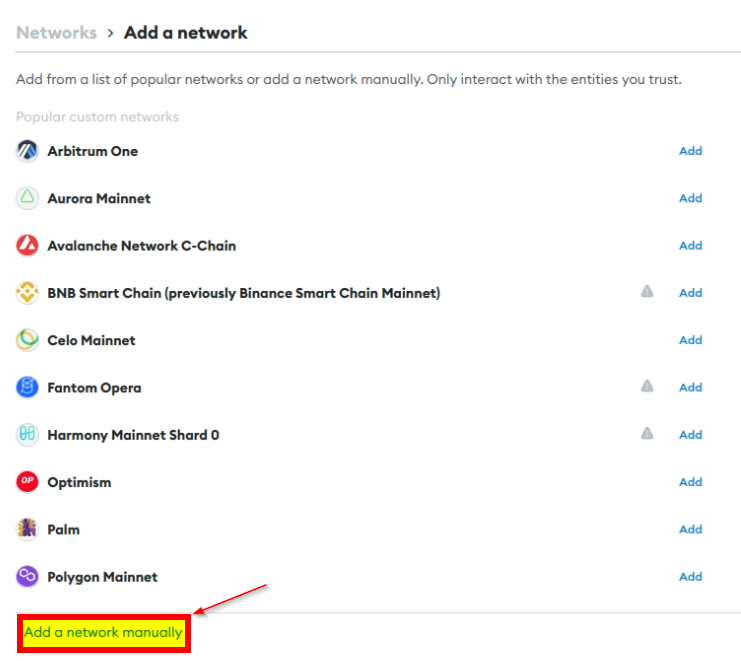
Add a Network Manually
Click on “Add a Network Manually” in the subsequent window.

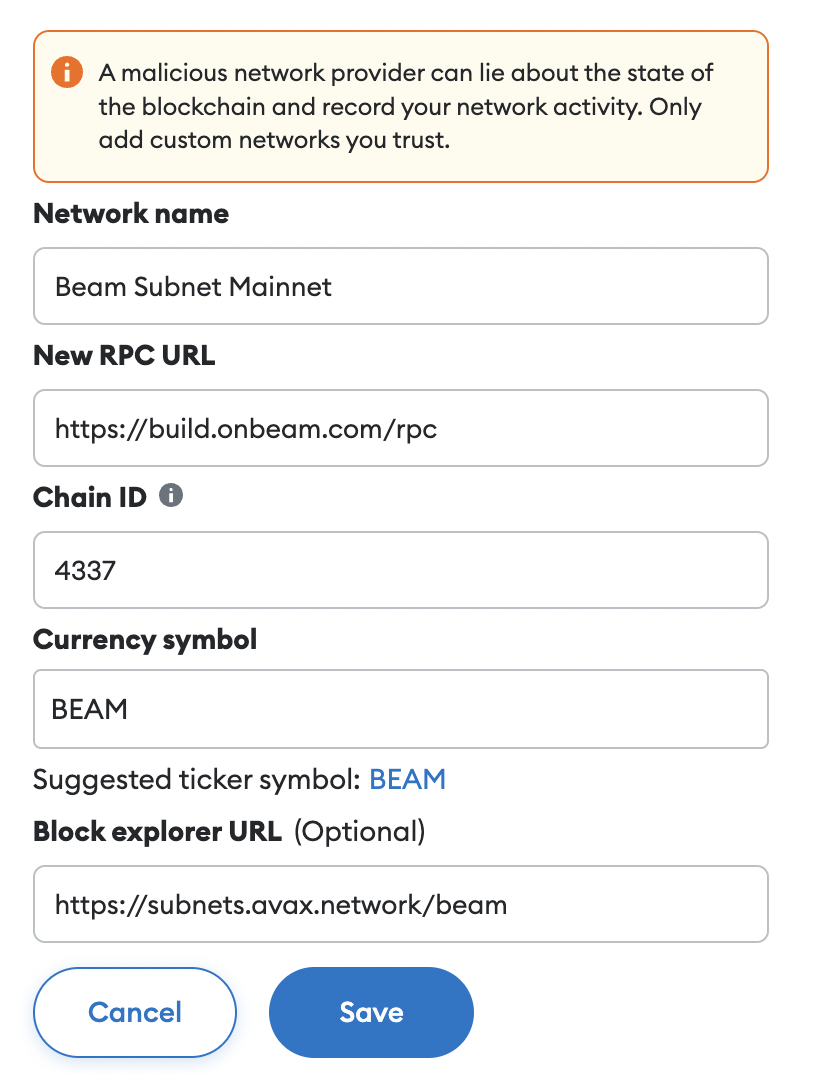
Input Beam Mainnet Settings
Enter the Beam Mainnet settings as provided above.

As an alternative, you can easily integrate the Beam Mainnet settings with a single click through Chainlist. Just click “Add to Metamask” to apply the MetaMask settings.
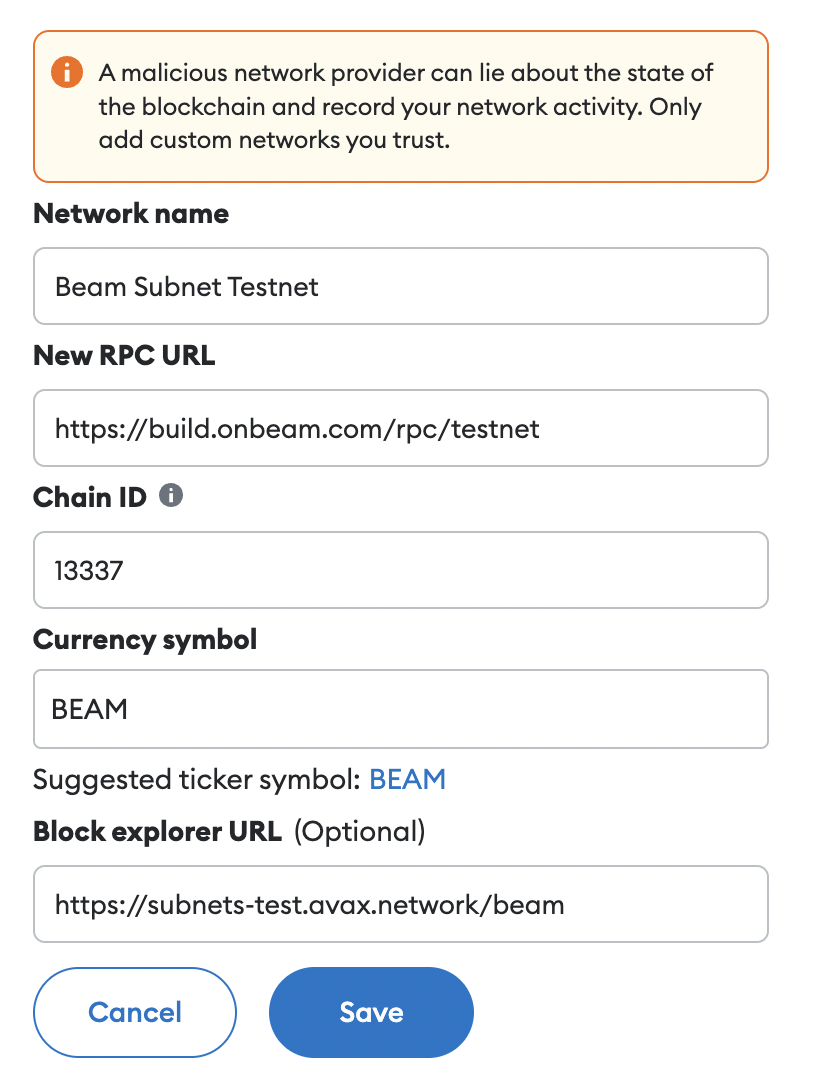
Beam Testnet (Fuji)
| Beam Testnet | Settings |
|---|---|
| Network name | Beam Testnet |
| RPC URL (http) | https://build.onbeam.com/rpc/testnet |
| RPC URL (WebSocket) | wss://build.onbeam.com/ws/testnet |
| Chain ID | 13337 (0x3419) |
| Currency symbol | BEAM |
| Block explorer URL | https://subnets-test.avax.network/beam |
| One-click setup |

As an alternative, you can easily integrate the Beam Testnet settings with a single click through Chainlist. Just click “Add to Metamask” to apply the MetaMask settings.