Getting started
Getting started with Beam is easy. The main requirement is to register your game through our Dashboard.
Registering your game
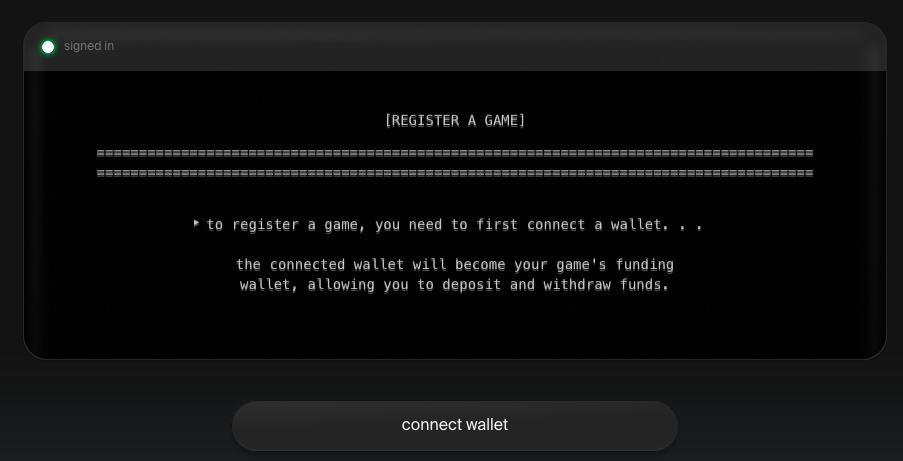
First, head to our Dashboard. We recommend starting with the Beta environment first to get a feel for the platform. Register your game and obtain your API key there.
https://dashboard.beta.onbeam.comLogin with your preferred social login option and proceed to register your game.
One of the first steps is Connecting a Wallet. We need to know which wallet will be funding your transactions. Don’t worry, nothing will be charged to your wallet, you decide when to deposit BEAM to your game.
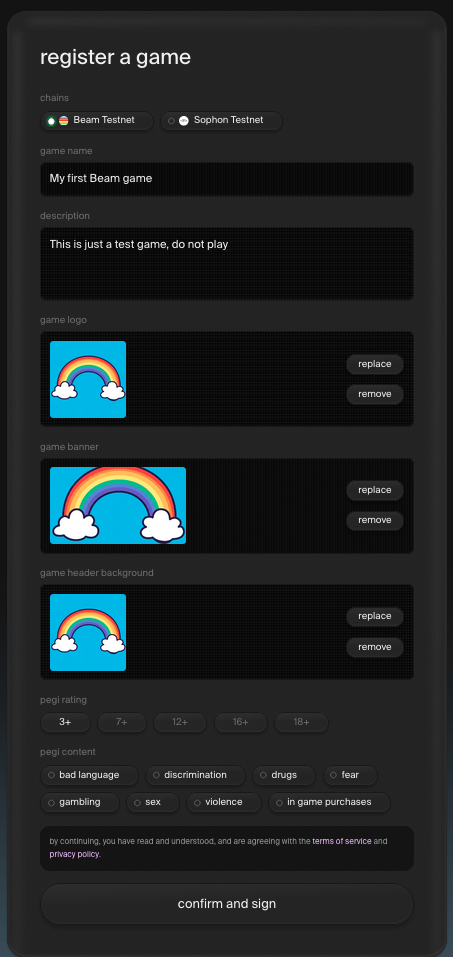
Afterward, a form will pop up. We need you to fill out some basic info about your game and set a few images (you can edit all of it later). Your players will see them and correlate actions they perform with your game.
You can choose a chain you want your game on. For testing purposes let’s select Testnet Beam. You can add another chain later on.
After confirming, the Wallet application of your choice will ask you to sign a message. This allows us to make sure that you are the owner of the game. A pop-up with your API keys will show up. Store your keys somewhere safe, you will need them to access our API.
We distinguish three types of keys:
-
Publishable
Allows you to interact with Player API, can be embedded in your game or client-side code. It essentially identifies your game.
-
Secret
Allows you to interact with Automation API. This can be used for example to manage your Games Contracts. This should never be shared publicly.
-
Regenerate
Allows you to regenerate your Publishable and Secret keys. This is useful if you think your keys have been compromised. You can regenerate them at any time through Automation API: POST /regenerate-api-keys method.
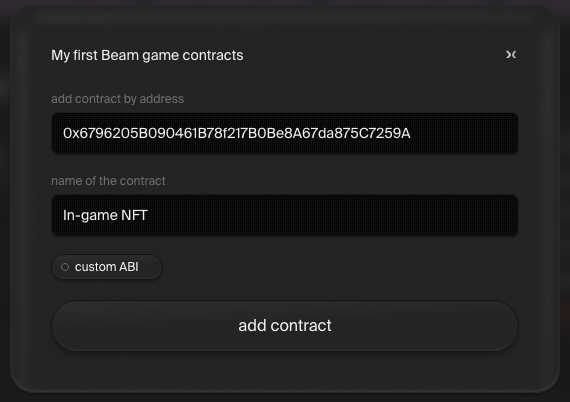
Adding Contracts (optional)
In order to do something within your Game, we should add some contracts. You can do this in the Dashboard, by going through settings to manage contracts.
If you don’t have any contracts yet — don’t worry! You’re able to proceed from here but will need to add a contract later to interact with these assets in your game.
We handle some global Contracts for all Games that allow you to implement basic blockchain functionalities, mainly BEAM and USDC currencies, Uniswap for Currency Exchange and Seaport for trading.
Your Smart Contracts need to be Verified in Avalanche Explorer.
You can read more about verifying your contracts in Verifying Smart Contracts.
We will automatically retrieve the ABI of your verified Contract.
NOTE: If you use a Proxy Contract for your main Smart Contract, select the custom ABI switch. When adding a contract, include the ABI of your main contract in the form of a JSON array. Your Proxy Contract still needs to be verified. Only use this option if you know what you are doing.
You can also manage your contracts through Automation API Contract Controller.
Interacting with the Beam API
Now we need to decide on the implementation strategy. You can read more about it in Player API vs Automation API. Afterwards, just pick one of the generated API Clients and start coding.
Would you like to start right away? Jump ahead to our SDKs for the Unity and Unreal game engines which use self-custodial Player strategy.
Need help?
If you would like advice or need help finding a strategy that suits your needs, please contact us at build@onbeam.com. We can provide help with bridging existing assets through LayerZero provide assistance around smart contracts to get your in-game assets going.